The first full scale project in Introduction to Woods is to build a toy that moves.
A) Successful production of scaled working drawings with 3 (or more) views of the toy you will create
B) How to glue up a blank (lamination)
C) Use of drill press to drill appropriately sized holes
D) Use of the bandsaw to cut curves
E) Use of files and rasps to refine a shape
F) Hand sanding
G) application of mineral oil finish
OPTIONAL SKILLS
1) Compound Miter Saw
2) Spindle Sander
3) Disc / Belt Sander
4) Planner operations
 PROCESS is an important part of your
final grade for this project. Write the following in your notebook:
PROCESS is an important part of your
final grade for this project. Write the following in your notebook:
The Wood Shop Library has several books about toys, machines, and other things that can be built with moving parts. THIS project is focused on a toy for a child; what qualities do children's toys have?
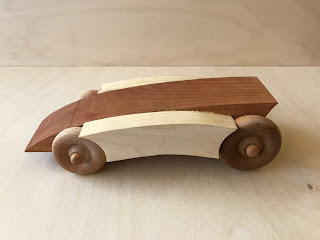 How do, or do not, these two cars meet the requirements for this project?

Here is a draft version of the end of project self-evaluation for you to help understand what this project may be like.
Learning Objectives
To successfully build this project you will need to demonstrate:A) Successful production of scaled working drawings with 3 (or more) views of the toy you will create
B) How to glue up a blank (lamination)
C) Use of drill press to drill appropriately sized holes
D) Use of the bandsaw to cut curves
E) Use of files and rasps to refine a shape
F) Hand sanding
G) application of mineral oil finish
OPTIONAL SKILLS
1) Compound Miter Saw
2) Spindle Sander
3) Disc / Belt Sander
4) Planner operations
Toy Design: Notebook Requirements
 PROCESS is an important part of your
final grade for this project. Write the following in your notebook:
PROCESS is an important part of your
final grade for this project. Write the following in your notebook:
Keeping my design and process notes for this project is an important part of my grade for this project.
I understand
this: _____________________________________ initials and date.
The Project
You are
to 1) design an age appropriate toy 2) build that toy to be safe and lovely. 3) You may use about a 1 1/2 board feet of lumber. If you need more lumber than this, please see Mr. Zartler (our hardwood lumber costs about $2.25 / board foot.
Board Foot Notes:
A "Board Foot" is 144 cubic inches of wood:
Examples of Projects
After
viewing and discussing the examples provided on http://woodworkinggrant.blogspot.com/2018/04/april-building-project.html note the important qualities of
these toys below:
Use these links to see some suggested projects (though some of the projects do NOT meet the criteria for this assignment).
All of these projects are child appropriate (though some are likely to challenging for your first project).
These projects mostly are appropriate (but were made by students with a bit more experience than you have now).
 How do, or do not, these two cars meet the requirements for this project?
Six Major Steps to a Toy
In the
space below take notes on the general steps to be followed: 1) Design-process; 2) Blank Production; 3) “Roughing Out”; 4) Detailing; 5) Surface Prep; 6) Finishing. Be
sure to add information to these notes as you learn more during the unit.
End of Project Self-Evaluation
Toy Build Self-evaluation
Include your full name;
date; and period: Be sure to include you scale plans for this project. You were allowed to make
many decisions about this project.
1) Begin your
self-evaluation by describing A) what you wanted to make; B) why you wanted to
make it; and C) what qualities you wanted your project to have (or not have).
2) Compare your finished
project with your scale drawing design for the project? A) How well do the two
match? B) In places where they do not match describe, as well as you can, why
there is a mismatch.
3) Your toy was supposed
to A) have moving part(s); B) Be designed to be appropriate for a specific age
range. Describe how your project did or did not meet these requirements.
4) Make objective observations
about your project: what can one see; feel; hear; taste(?) in regards to the
quality of the project.
5) Describe any personal
aspects of success, failure, and learning that relate to your completion of
this project.
No comments:
Post a Comment